iOS 17+で使えるSwiftUI用のAPIに .contentTransition(.numericText()) というのがある。
- numericText(countsDown:) | Apple Developer Documentation
- numericText(value:) | Apple Developer Documentation
使い方は簡単で
Text("\(value)")
    .contentTransition(.numericText(value: value))
こうやって書けば、Textの中身が変わる時にアニメーションしてくれる。withAnimation {} 経由でStateは変えないといけないことに注意。
試してみる
でっかい乱数を生成して4桁ずつスペースで区切って表示する。
struct ContentView: View {
    @State private var number: Int = 0

    var body: some View {
        VStack {
            Text(format(number: number))
                .font(Font(UIFont.monospacedDigitSystemFont(ofSize: 32, weight: .bold)))
                .contentTransition(.numericText(countsDown: true))
            Button("Random") {
                withAnimation {
                    number = Int.random(in: 1...10000000000000000)
                }
            }
            .buttonStyle(.borderedProminent)
        }
    }

    func format(number: Int) -> String {
        let formatter = NumberFormatter()

        formatter.groupingSeparator = " "
        formatter.groupingSize = 4
        formatter.usesGroupingSeparator = true
        formatter.minimumIntegerDigits = 16

        return formatter.string(from: NSNumber(value: number)) ?? ""
    }
}

実用性がある感じで試す
カウンターを実装すれば早いけど、すぐできちゃうので別の実装をしてみる。
struct CreditCardView: View {
    @State private var cardNumber: String = "4111 1111 1111 1111"
    @State private var show: Bool = false

    var body: some View {
        ZStack {
            RoundedRectangle(cornerRadius: 8)
                .fill(Color(.lightGray).shadow(.drop(color: .black.opacity(0.2), radius: 4, x: 0, y: 0)))
                .stroke(Color(.border), style: StrokeStyle(lineWidth: 1))

            HStack {
                HStack(spacing: 16) {
                    Image(systemName: "creditcard")
                        .resizable()
                        .scaledToFit()
                        .frame(width: 20)
                        .foregroundStyle(Color(.border))

                    Text(cardNumber)
                        .font(Font(UIFont.monospacedSystemFont(ofSize: 16, weight: .bold)))
                        .contentTransition(.numericText(countsDown: show))
                }

                Spacer()
                Button(action: {
                    withAnimation {
                        show.toggle()

                        if show {
                            cardNumber = "4111 1111 1111 1111"
                        } else {
                            cardNumber = "**** **** **** 1111"
                        }
                    }
                }, label: {
                    if show {
                        Image(systemName: "eye.fill")
                            .resizable()
                            .scaledToFit()
                            .frame(width: 20)
                            .foregroundStyle(Color.gray)
                    } else {
                        Image(systemName: "eye.slash.fill")
                            .resizable()
                            .scaledToFit()
                            .frame(width: 20)
                            .foregroundStyle(Color.gray)
                    }
                })
            }
            .padding([.leading, .trailing], 16)
        }
        .frame(height: 60)
        .padding([.leading, .trailing], 16)
    }
}
これを実行するとこうなる
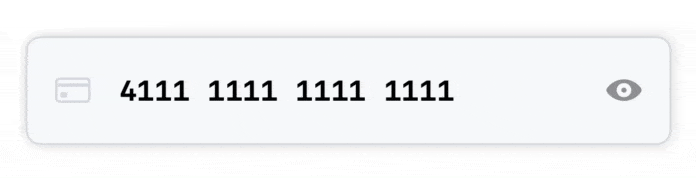
いい感じにアニメーションする処理が簡単なコードでかけてめでたい。
.numericText(countsDown: show) でshowの値をみることで下がるアニメーションと上がるアニメーションをトグルできるようにしているので、隠す時と表示する時で対応した動きができるようになっている。